Saturday, September 29, 2012

Little Red Riding Hood

There is nothing more gratifying than completing a project!!! and I have finally finished my Little Red Riding Hood costume that I started in 2004.  8 years ago I wanted to make this costume.  I bought the patter and the materials and got started.  I even had to enlarge the pattern as 8 years ago I weighed 130lbs more than I weigh today.  So it began. 

With the pattern adjusted and the pieces cut the project was quickly overtaken by another MUST DO activity and it sat... for 7 years... In a box of projects....  never to see the light of day....

Until...

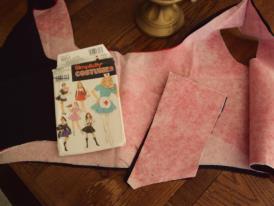
I was looking through the boxes of fabric when I found it!  I was excited and quickly gathered all the pieces and started again...  Needless to say it didn't fit... oh and I no longer had the pattern... so I laid it out on the table and began to re-engineer it. 


Re-engineered and down to the right size I began construction.  Below is the outside panels put together. 

 
I prepared the lining in the same manner,  added boning at the grommet lines and it looked like this. 
All we needed now is to trim out the bottom.  (this part took a while because I couldn't figure out how I wanted to accomplish this)

 
the original pattern called for a short skirt which by now I wanted to change and since I didn't need all 4 of the skirt panels I was able to use two of the 4 to extend the others.  I added a ribbon over the seam line because I didn't like the way it looked.  I also split the two panels into 4 to make an 8 paneled riding skirt with slits from the mid thigh down. 

With a draw string closure the final skirt looks like this.  The red ribbon is so I can tie up the front of the skirt if I want to show off my (future project) pantaloons or under skirt. 

Finally after trimming the bodice with ribbon like bias tape it was time to grommet.... My absolute least favorite part.  So I enlisted the help of my talented boyfriend and he did it for me... (yes that is a sharpened ratchet tool from the tool box to make the grommet holes)

 
The final product!!! (well except the shoulders which I was still in the process of finalizing how I wanted it).

 
After grommeting the shoulders here it is!!! I used a chemise and underskirt that I already have to take the picture...  


I put it on three times the weekend I finished it.  I walked around the house in it... I did what ever I wanted.  I cannot wait to wear it at the TX ren fest


Thursday, August 16, 2012

Princess Leia Continued...

Ok, so all the pieces are sewn together and the fully lined dress is all but complete.  The hem is all that remains of the dress.  I will post some pics of the completed dress as I take them.  The next steps will be the belt and boots (eBay). 
I have opted not to use leather for this run as the white leather I priced at Tandy was very expensive… so white vinyl  it is.  The schematics for the metal belt pieces are shown here.  It’s coming along step by step.  I’ve only been distracted by my little red riding hood costume. :P
I cannot wait to post the final results. 

Image from Kay-Dee Designs

Thursday, May 17, 2012

Princess Leia - ANH

So, since I was a wee girl I have been obsessed with Star Wars.  My father and I saw the movie on the silver screen when I was a young age of 5 years old.  From that moment on my barbies were trash and every star wars action figure became MINE!  Well, years later I have finally decided to recreate the Princess Leia outfit from A New Hope.  With much assistance from my brothers and sisters in obsession I have begun the process.  And just so I can show off my handy work I have decided that I will host a party that will be star wars themed where costume is not required but highly encouraged.  :)

So we start.  after many hours research, reading lessons learned and viewing photos of creations and orginal cosutme I layed out my design.,.. 


As you can see I'm not a great artist however it gets the ideas in a tangible place.

The next step was to get the pattern drafted... I took a roll of shipping paper and drew out the elements and got them cut out as seen here

Looks simple right?  Only three pieces. 

The Dress piece is made like a simple t-tunic.  So there will be no shoulder seams.  The fabric is folded in half short then long ways... This creates a double fold across the top of the arm and a single fold down the center.  Once cut there will be two pieces.  the front and back.

Here are the pattern pieces after cutting out the fabric.


Oh yea... the cat LOVES the pin cushion.... she pulled them all out...  it took a while to find them in the carpet.  Silly Kitty... Pins are for sewing.   


The next steps.... putting it all together.

TO BE CONTINUED....